

Stand taller. Move freely.
Unlock a stiff upper back, open up tight shoulders and build the band strength to hold good posture without thinking about it. Taught step by step by a remedial massage therapist and personal trainer.
- Light equipment: a roller, a ball and a band
- Clear progressions from beginner to strong
- Built-in workout log so you can see yourself improve
Lifetime accessAny deviceSecure checkout
Does this sound like you?
- There's a knot between your shoulder blades that never quite lets go
- Your shoulders roll forward in photos, and you're always pulling them back
- Reaching overhead or behind your back feels tight or pinchy
- Your upper back aches after a day at the desk or the wheel
- You've been told you have bad posture, but nobody showed you how to fix it
A stiff upper back and tight chest drag your shoulders forward. The muscles between your shoulder blades get stretched, weak and sore. Free the spine, open the chest and strengthen the back, and your shoulders settle where they belong.
Posture you don't have to think about
This isn't 'sit up straight'. It's the method George uses with clinic clients: release the tight spots, stretch what's pulling you forward, then build the upper back and rotator cuff strength that keeps you there.
- 1Release
Foam rolling and trigger ball work for the upper back, rotator cuff, chest and upper arms.
- 2Lengthen
Chest, shoulder and triceps stretches to open the front of your body.
- 3Strengthen
Band rows, pull-aparts, rotations, presses and push-up progressions, each with easier and harder options.
Your 8 weeks, step by step
Short sessions, clear progressions, and a workout log that shows you getting better week by week.
- Push-up and plank progression masterclasses
- Interactive workout log that remembers your reps and bands
- Four recipe books with meal plans
- Certificate of completion
- Week 1Safety first, your starting self-check, and the daily release routine.
- Weeks 2–4The full routine 2–3 times a week. Your upper back loosens and reaching gets easier.
- Weeks 5–8Step up the band work and push-ups, then re-test and compare.
- For lifeKeep it with a short maintenance plan and a flare-up plan.
Everything you get
Upper Back and Shoulders DIY Program
Free up stiff shoulders and a rounded upper back, then build the strength to stay upright.
Created by George KatsoulisRemedial massage therapist & personal trainerWhat you'll learn
- Know the red flags and use the 0–10 pain rule to train safely
- Measure your starting point and re-test at week 4 and week 8
- Understand how a stiff upper back and tight chest lead to shoulder pain
- Roll out the upper back, rotator cuff, chest and upper arms
- Stretch the chest, shoulders and triceps
- Strengthen the upper back and rotator cuff with resistance bands, with easier and harder options for every exercise
- Progress push-ups and planks with good technique
- Keep your results with a simple maintenance and flare-up plan
Program content
1Start Here6 lessons · 40 minWelcome, safety, your starting self-assessment, and how and why the program works.
- Welcome: how to use this program6 min
- Safety first: red flags and the pain rule5 min
- Your starting self-assessment15 min
- How your upper back and shoulders work6 min
- Why we roll, stretch, then strengthen5 min
- Start Here: quick quiz3 min
2The Tools1 lesson · 4 minWhat you need and how to use it.
- Resistance Bands4 min
3Postural Strength3 lessons · 2 videos · 24 minWhy posture, mobility and strength work together, and the technique to use for every exercise.
- Postural strength: the key areaFree preview16 min
- Technique Overview5 min
- Postural Strength: recap and quiz3 min
4Posture3 lessons · 1 video · 13 minHow to sit and stand so your body is balanced.
- Posture: introduction6 min
- Standing & Sitting Posture1 min
- Everyday habits for your upper back and shoulders6 min
5Balance Discussion1 lesson · 1 video · 15 minWhat balance in the body means and why it matters for pain.
- Balance15 min
6Rolling1 lesson · 7 videos · 13 minRelease tight muscles with self-massage. Do these daily.
- Rolling routine7 videos13 min
7Stretching2 lessons · 6 videos · 15 minLengthen what has tightened. Do these after rolling.
- Stretching routine6 videos12 min
- Rolling & Stretching: recap and quiz3 min
8Strength3 lessons · 11 videos · 1 h 8 minBuild the strength to hold good posture. Every second day.
- Progressions and regressions: find your level5 min
- Strength routine11 videos1 h
- Strength: recap and quiz3 min
9Alternate Day2 lessons · 7 videos · 17 minA lighter routine for the days between strength sessions.
- Alternate-day routine7 videos12 min
- Troubleshooting and common mistakes5 min
10Keep Going4 lessons · 27 minRe-test, your maintenance and flare-up plan, a glossary and the final quiz.
- Re-test your progress (week 4 and week 8)15 min
- Keep going: your maintenance plan6 min
- Glossary3 min
- Final review quiz3 min
11Your workout log1 lesson · 5 minYour routines on one page: tick each exercise, log your reps and band, and beat last time.
- Your program & workout log5 min
Who it's for
- Your shoulders feel tight or round forward
- You get upper back pain between the shoulder blades
- You want a home program with minimal equipment
- You have been told you have rounded shoulders or poor posture
What you'll need
- Foam roller
- Trigger point ball
- Peanut roller (two balls taped together works)
- Light and medium resistance bands
- A mat or carpeted floor
About this program
Rounded shoulders, a tight chest and a stiff upper back go together, and they are behind most of the shoulder pain we see at the clinic. This program releases the upper back, rotator cuff and chest, stretches what has shortened, and strengthens the back of the shoulders with resistance bands.
Each section is a follow-along routine: tick off each video as you do it, and come back to them whenever you need a refresher.
Your instructor
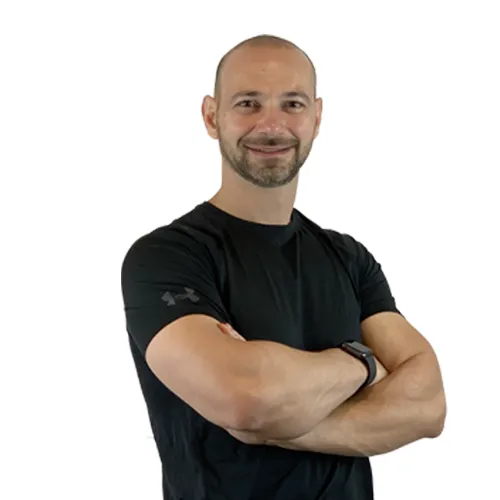
George has been in the health and wellness industry for over 20 years, specialising in remedial massage and personal training for better movement and pain relief. He educates clients on how to improve their own health, runs self-care workshops, and has turned that teaching into easy-to-follow programs you can use in your own time to take back control of your body.
Questions
Do I need a gym?
No. Every routine is done at home or at your desk with a foam roller, a trigger ball and a resistance band. The Tools lesson shows what to buy.
How long does it take each day?
Most routines take 10 to 20 minutes. Rolling and stretching can be done daily; strength work is every second day, with the alternate-day routine in between.
What if an exercise hurts?
Stop any exercise that causes sharp pain. Some discomfort while rolling tight areas is normal, but it should ease as you go. If pain persists, book in with your practitioner.
How long do I have access?
For life. Watch the videos as often as you like; coming back to check your technique is encouraged.
I have a rotator cuff injury. Can I do this?
Many people with rotator cuff problems do well with this kind of program, but check with your practitioner first, start with the lightest band and keep every exercise within the 0–3/10 pain range.
How soon will I notice a difference?
Rolling and stretching usually feel good straight away. Lasting change comes from the strength work, usually between weeks 3 and 6.
Why is the strength routine so long?
It includes some longer how-to videos, like Perfect push-up progressions. Watch those once; after that, follow the printable list. The actual routine takes 25–30 minutes.
What if I miss a few days?
Pick up where you left off. Do not double up. After two weeks or more off, drop back one level for your first session.
Is this instead of massage?
No, it works alongside it. Treatment settles things quickly; the program keeps the results.
Your best posture is a few weeks away.
Start today with lifetime access and follow along at your own pace.